Thursday 19 April 2012

Randomness: bllllleuuurghhhh!!!!

Hello lovelies!!!
Not a big post!! I just wanted to drop in and say a quick "'Ello" and that I'm still here its just that I have been infected with some kind of air-born Rickets or Scurvy I can't tell which, maybe the Plague- who knows!!! Anywhoo I am ill and gross and I just don't have the energy at the minute to put together a post that is vaguely informative or more importantly coherent! 


So aside from my Lurgey a few exciting things have happened.... The Beau is home but we can't go out and do anything nice because of my riddled-ness but still it's nice to have him back even if it's just to look after the dogs so I can sit and feel sorry for myself AND we are looking- just looking, he keeps reiterating this part; at buying a new house. What fun!! I swear there is some gypsy in me somewhere I just never settle and I've been itching to move for the last 4 years; we've only been here 5 years now. This would be my 23rd house in 25 years!! Cripes!! 


So yeah...I will be back over the weekend me reckons but for now I shall leave you with this very accurate visual interpretation of how i feel at la mo!!


Saturday 14 April 2012

Playlist: Music for my Youth

I've had a bit of a shitty week and for some reason unbeknownst to me; whenever I'm feeling low, I get really nostalgic and wish for times when I was all young and care free and disco dancing with a Jack and Coke in one hand and a cigarette in the other.... I was young- I didn't understand that it's not a win! I just wanted to do some disco dancing and kiss a boy. Now I'm married, the cigarettes are gone and yoga is in. I have replaced disco dancing with baking and a Jack Daniels for a Gin and Tonic. But for today I am 18 again and I am dancing around my kitchen to these treats; partying like its 2006...


(This is me circa 2006, the only picture I have from then really I think... I can't remember who I was talking to and I forgot my boobies were ever that brilliant...ahhh youth)

Hey Scenesters- The Cribs
Hounds of Love- The Futureheads
Beating Hearts Baby- Head Automatica
An Honest Mistake- The Bravery
Date with the Night- Yeah Yeah Yeahs
Daft Punk is Playing in My House- LCD Soundsystem
Club Foot- Kasabian
Fake Tales of San Francisco- Arctic Monkeys
Last Night- The Strokes
Naive- The Kooks


Friday 13 April 2012

Craft: The easy peasy T Shirt shopper!


Eeeexciting! Today is my first ever craft post and I was trying to think about which thing to do first so it seemed a little obvious to use the one that I use the most. These bags are just the handiest thing. They are great for prezzies for people and a fab way of doing a bit of recycling and general do-goodery. Biggest bonus they are pretty much a piece of piddle to make!

You will need:
An old tee, something with a good design
Pair of pretty sharp Scissors
A Stapler
 Gaffa/Rhino Tape
a Tape Measure
A Pen
Little tip: if you have a dark t shirt, get black gaffa; a light one get the white. Just looks better....


The first thing that you need to do is to turn the t shirt inside out and cut off the sleeves.


Lay your T Shirt out as flat as you can and then starting at the bottom lay strips of Gaffa across the fabric. You want to smooth out any creases in the fabric as you go, it just makes life easier later on. Keep working up the fabric right the way to the top! Once you have gone right to the top, flip the t shirt and do the same on the back. Having a Cat assistant is optional.....


So when you are done taping you will have sort of sealed the t shirt shut. You now need to trim it up. Cut an inch off the bottom so that it in now open again and cut out the neck hole.  Down the sides cut away any excess tape but being ridiculously careful not to cut through the fabric.  


You now need to trim the sleeves. You want to make them a little exaggerated as these bits are going to form your handles. Once you have a shape your happy with, fold your t shirt in half so that you can create the mirror image down the other side of your t shirt and your handles will match and trim away! 


You then need to fold your t shirt so that the two side seems are on top of each other. So instead of the seems running down the sides they are in the middle.


Making sure your hems are matching, half and inch up from the bottom staple right across the bottom. You want the staples as straight and as close to each other as possible.


Run a strip of Gaffa over the staples so that you don't end up catching your fingers on them.


So you need to move back up to the top of the bag now to sort out the handles. In the neck hole, you need to make that shape more exaggerated so that you can get all of your crap in the bag! Im limited by the print on mine as I didn't want to cut through Darth's Lightsaber; I don't think he could handle that- so I had to cut my hole slightly smaller. You want to do it to around the pink line that I drew on the t shirt if you can; if you can't it just means you have a smaller hole but it's not a big problem! 


Right now comes the tricky bit. Stick with me and hopefully the pictures help to make things a little clearer... You need to make this shape out of the t shirt....


To do it, you pick up the bag by one of it's bottom corners and it should naturally bend in the middle. You then need to grab the opposite corner and nip them together. Then lay them down flat on the floor or table and it should make the shape above.


From that bottom point you want to measure 5 inches up the bag and draw a straight line across. No, I'm not really sure why my tape measure says 3 inches, Im such a dumbass sometimes but it is definitely 5 inches from that bottom point.


Now trim off that extra little point that you don't need and like you did on the bottom; staple right across the line and then cover it with a strip of gaffa again. Then flip the bag over and do the same with the other point. All you need to do then is just turn the bag inside out! I hope i've made the instructions as clear as I can. It's not the easiest thing to describe but it really is the easiest thing to make!


What do we think?? Im pretty pleased with this one really and i've been using it to store all my knitting in. You could make a whole fleet of them for re-usable shopping bags and you would look the dandiest kid in Morrisons! Hurrrah! 


Monday 9 April 2012

Cooking: Baked Eggs with Spring Greens and me Marinated in Gin...


Well, I'm sat here trying to type up this post in a state that can only be described as "Gin Marinated"....Horrific! 

Me at the start of the night:  


Pretty reasonable I think you'll agree. Plus I was wearing my Black Milk Leggings so was feeling pretty dandy!

And this is after: 


Nessa has turned into the tiniest elf and I just.......christ....sleepy gin eyes! 

So to say I am all delicate and hungover is an understatement and when I am delicate and hungover there is only one thing I must do: nest on the sofa and eat. At the minute all I want is a McDonald's Fillet O Fish and a vat of Ribena so I thought it would be appropriate to do a food post. I cooked this the other night and it was absolutely delish. So while for the rest of the day, I will be eating things like this: 


you should definitely try this little baby. It serves 2 as a lunch or just one as a greedy dinner. Needless to say, I had it to myself.

Baked Eggs with Spring Greens.

Preheat the oven to 180C, regular oven or 160C fan

Butter for Greasing
1 Bay Leaf
2 Tablespoons of Olive Oil
Salt & Pepper
Tbsp of Fresh Tarragon
1 Red Onion
100g of Spring Greens, shredded.
(you can also use Swiss Chard but my supermarket never sells it and I hadn't been to the Farm Shop, even some savoy cabbage or kale would be good)
2 eggs
110g of crumbled goats cheese

Butter your ramekins or baking dish if your having this to yourself and stick them aside. Chop your onions. I diced them but you could just as easily have half moons; it may even look a little prettier. Then heat your oil, I'm using that liquid Flora at the minute and I think it's pretty good and a bit healthier then regular olive oil. When your oils hot enough add your onions and bay leaf. You want to caramelise the onions, not colour them so don't have the heat too high. Also if you add a pinch of salt to your onions, it stops them frazzling- Handy tip! 


I've given you a weigh for your spring greens but the best thing you can do is fill up your dish, heap it us a little as the greens will wilt some. Your onions should take about 15 minutes to gently caramelise and when they're done, take them off the heat, fish out the bay leaf and add in your greens. You don't want to fry them at all, just wilt them and they should have enough liquid on the leaves if you've washed them that they just steam and wilt slighlty. Give them a good stirring round the pan for a minute and then transfer them to the ramekins or dish.


Evenly distribute your onions and greens in the dish and then make a little well for your eggs. Crack your eggs into their little wells and give them a good seasoning. Then pop them into the bottom shelf of your oven for 10 minutes. In the meantime you want to roughly chop your tarragon; you don't want it too fine, nice strands.


When it's had it's 10 minutes, take the dish out of the oven and wack on the grill. While your grills heating up, sprinkle your goats cheese over the top. I had a little piece of stilton that needed using so I threw that on there too but normally I would just stick to the goats cheese. Add your tarragon on top and then pop it back under the grill until the cheese bubbles and melts.

  
Et Voila! C'est magnifique n'est-ce pas ? It's all delicious and melting underneath and the top gets crisp and crunchy. I served it with some crispy bread for dipping up all the eggy cheesy bits and it was just heavenly. Also I think it's a really nice way to serve eggs instead of just frying or poaching them...Also I think you could play about with it quite alot. I was thinking that a few roasted baby beetroots, sliced into wedges and thrown in would be yum too; it's one of those where you can adapt it to what you like best. What would you do with it?


Friday 6 April 2012

Randomness: This bitch be wild! .....a knitting update...


Never say that I don't know how to work a friday evening! Jumanji is on the Tv, cup of tea is hot and I am knitting the shit out of this thing!  

Playlist: Rain, Quiet Times and Melancholy


Best Used: If it's quite rainy and cold outside and your a little wistful, sat inside with little to do.


Directions for use: Get your best wooly scarf and Jumper combo going, definitely some toasty socks and have a hot chocolate to hand. Get cosy and watch the rain fall ....


Strange But Beautiful by Aqualung
Skinny Love by Bon Iver
Anyone Else But You by The Mouldy Peaches
Love Will Tear Us Apart by Nouvelle Vague
Keep your Head Up by Ben Howard
Pale Blue Eyes by The Kills
I will Follow You Into The Dark by Death Cab For Cutie
Maps by Yeah Yeah Yeahs
Everlong (Acoustic) by Foo Fighters
Toothpaste Kisses by The Maccabees
Good Feeling by Violent Femmes


Randomness: Knitty Bea


This is my life now.... I knit.... my ascent into being a nana is complete... Now, bring me my Ovaltine!! 

Thursday 5 April 2012

Randomness: * just a quickie *

Two bits of news kids! Crappy one first! 


For some reason, Blogger has decided, "Today Becka, I hate you" and jiggled up all my old posts so none of them are in any order now!! UUUrgh I hate technology! I wish I were sending these little messages to you all by Carrier Pigeon or something.....Hopefully it corrects itself, If not, my blog will read out of order and like mad persons rant; then again, it is my blog were talking about so in a way it may even make more sense! 


Second, more betterer, funnerer news.


When I first started Beabarella I thought that I was just going to whitter away about makeup to you all as the Beau will not tolerate another Pink Vs. Red lipstick debate, but in the 2 ish months I've been doing this now and the more I get to talk to all you lovelies out there; there's just so much more I want to share with you all. So I've decided, sod it, I'm including everything! So from today, though little bits have crept in already, anything that interests me; your going to see start making its way into the blog. There will be music and cooking and crafts and hopefully all you guys are on board with the idea! Last weeks BBloggers was about content and it just made me realise that it's my blog, I'm the captain of this bizarre, non sensical ship and I'm using my Captains Top Trump card to expand it. I hope it makes it a better, more fun place to sit and have a bit of a read and also hopefully, which is my favourite bit; get involved. Pirate hats at the ready kids! It's going to be a great bloody trip!! 

Cooking: Moelleux au Chocolate with a Salted Caramel Melting Middle


Cooking time again! Last time I did guilt free so I thought this time I would go all out full on indulgence- with lard on top! A few people commented on my picture of my Moelleux au Chocolate- basically melt in the middle chocolate amazing heaven-ness... So here it is!

Ingredients for your Moelleux au Chocolate with a Salted Caramel Melting Middle.
For the Caramel:
150g Caster Sugar
150ml Double Cream
Teaspoon of Maldon Salt

For the Batter:
85g Unsalted Butter
170g Light Brown Sugar
85g Plain Flour
6 Eggs
200g Dark Chocolate (min 60% cocoa)
Few Tbsp of Cocoa Powder

Pre-heat your oven to 180C

First off, you want to make your Caramel. You could buy a good quality caramel sauce but it isn't the same as making your own I don't think plus it wouldn't be perfectly salted! In a large heavy bottom pan, put in enough of your caster sugar to cover the bottom only. Don't put it all in in one go or it makes the caramel difficult to work with and it can crystallise easily. Then when the outsides start to melt and colour you can add the rest of the sugar. 

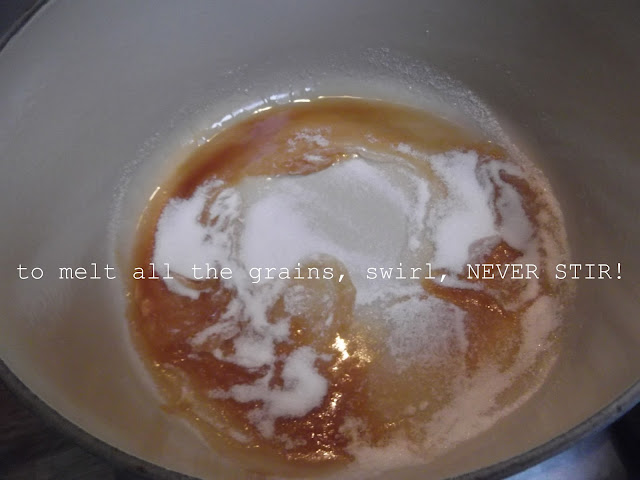
SUPER IMPORTANT TIP!!! NEVER STIR MELTING SUGAR!!!

This makes it crystallise in a second and form clumps. To combine it, swirl the pan! 


Gently heat the sugar till it reaches 112C and then add the double cream. It will bubble up like crazy and try and attack you a bit so stand right back after you add it. It will bubble up and then you need to combine the cream with the sugar, so after its finished bubbling, add your salt and swirl the crap out of it! Swirl, swirl, swirl and the cream and sugar will become one. Pour your caramel into a jug and pop it into the fridge to chill. Caramel done!

For the batter; mix together your flour (I used a Gluten and Wheat free one but you can use any Plain Flour) and brown sugar. In a separate bowl melt together your butter and sugar. I'd recommend doing this in a bowl suspended over some gently simmering water. I did it straight in the pan on the lowest heat possible but to avoid letting it ever have the chance to burn I'd recommend the water/bowl method.

Once the chocolate is melted, mix in the flour and sugar. Stir them together and you end up with a thick paste. Give it a minute to cool and then, one at a time add your eggs. Keep stirring the mixture so you don't end up with scrambled eggs and you should end up with a luscious glossy batter. 


Maybe before you start; but I am so unorganised and always forget about lining tins and such and end up doing it half way through, you want to grease your ramekins with a good slick of butter and then "flour" them with some cocoa powder. Then top up your pots, I get 6 ramekins worth out of this batter. You only want to fill said ramekins 3/4 full so you have room for a little souffle-ing and the caramel. Leave them to chill in the fridge for an hour or so.


After an hour or so, the ramekins and the caramel come out of the fridge and it's time for the fiddily bit. Not a massive stress so don't have a flap, just a bit of piping..... Your caramel should have firmed a little to the consistency of... Nutella! Yes, it should be Nutella thick now.....


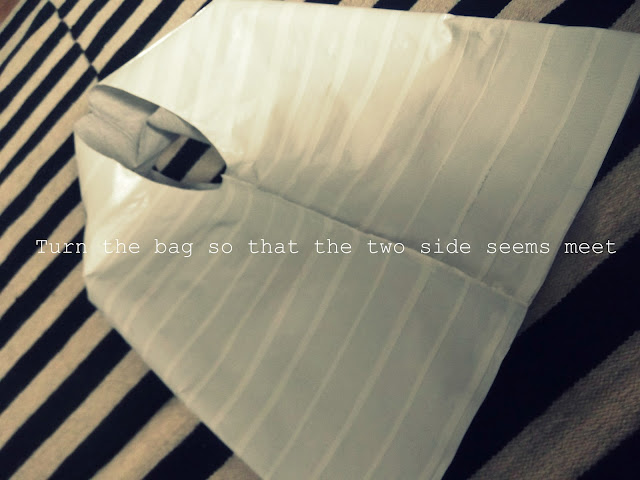
I have one of these squeesy piping tubes for jobs like this but you could easily do it with a regular piping bag or failing one of those, try a thick sandwich bag with a little snip out of the corner. So fill up your piping tool with caramel and squirt a blob of caramel into the center of the pudding. You want it to be under the surface, not on top or you won't get your oozy centre.


When they are baked; which takes 15 minutes in a 180C oven, turn them out onto a plate and just bloody eat! I like mine with a dollop of Creme Fraiche, I think it cuts through the chocolate poy-fectly! I have eaten a lot of puddings in my time....ALOT and I really do have to say that these are my ultimate favourite ever! The best thing is that if your trying to impress; these are pretty damn easy to make, but bloody amazing to anyone who doesn't know how to do them!